
Tips
How to Safely Remove Lash Extensions – Professional Step-by-Step Technique
Jul
Lash extension removal is just as important a part of a lash artist’s work as the application itself. A correctly performed removal allows you to safely dissolve the adhesive and slide off the extensions without damaging the client’s natural lashes. In practice, what matters most is not just the product you use, but also your technique and patience while the adhesive bond is dissolving.
In a professional lash studio, the most commonly used removal products are cream or gel removers that dissolve the cyanoacrylate in lash adhesive. This allows extensions to be gently slid off the natural lash without pulling, and without any risk of damaging the hair follicle.
Client Prep Before Removal
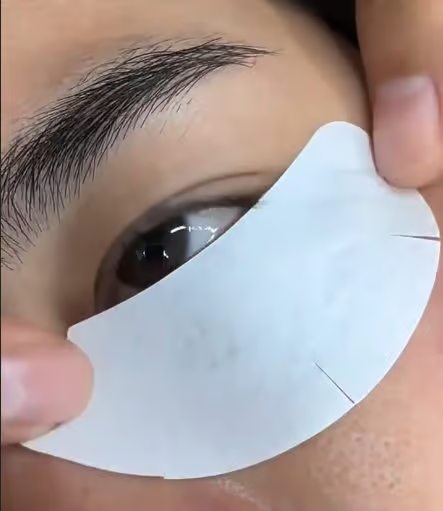
Every lash removal service should begin with correct setup and securing of the lower lash line. Apply hydrogel or collagen under-eye patches to separate the lower lashes from the upper lashes and protect the skin from contact with the remover.
It’s also important to ensure the client’s eyes are fully closed and will remain closed throughout the service. Products that dissolve lash adhesive can emit fumes, so client comfort and safety should always be the priority.
Sample hair extensions removal tutorial
Applying the Remover to Lash Extensions
Once the lashes are properly secured, apply the remover. Use a micro-swab to pick up a small amount of product and distribute it along the lash line, focusing on the area where the adhesive bond is located.
The product should coat the synthetic lashes in a way that allows it to penetrate the bonding point between the natural lash and the extension. After applying the remover, leave it on for a few minutes to allow adequate time to dissolve the adhesive.
- How to Choose the Best Lash Extension Tweezers – Types and Uses Compared
- How to Safely Remove Lash Extensions – Professional Step-by-Step Technique
- Black Brown Light Volume – How to Work with Black-Brown Lashes
Dissolving the Adhesive and Gently Sliding Off Extensions
After a few minutes, the adhesive begins to break down, allowing you to gently slide the extensions off the natural lashes. At this stage, lash artists typically work with two micro-swabs, using very gentle sliding motions.
Extensions should never be pulled or yanked. If an extension doesn’t slide off freely, it means the adhesive hasn’t fully dissolved yet — leave the remover on for a little longer.
Removing Individual Extension Residue
In some cases, a few extensions may remain adhered to natural lashes. In this situation, reapply a small amount of remover and wait a moment for the adhesive to re-soften.
Using a tweezer to very gently separate a synthetic lash from a natural one can sometimes be helpful — but always do this with great care. Natural lashes are delicate and should not be subjected to excessive tension.
Cleansing Lashes After Removal
After all extensions have been fully removed, thoroughly cleanse the lashes of any remover residue. This is most commonly done using a dedicated lash shampoo or sterile saline solution.
Thorough cleansing is very important — remover residue can affect the condition of the lashes and make it harder to apply a new set.
Finish by gently brushing the lashes with a spoolie to check their condition and confirm all extensions have been completely removed.
Why Professional Lash Removal Matters
DIY lash extension removal at home often leads to damage of natural lashes. Clients tend to pull or rip extensions off, or try using oils that can’t dissolve professional lash adhesive.
This is why lash removal should always be performed by a trained lash artist using the correct products. Professional remover dissolves adhesive in a controlled way, leaving natural lashes in good condition and ready for the next set.
